


1. To install Apache Maven on Windows, you just need to download the Maven’s zip file, and Unzip it to the directory you wish to install, and configure the Windows environment variables.
2. Make sure JDK is installed, and “JAVA_HOME” variable is added as Windows environment variable.
3. Download Apache Maven
Visit Maven official website, download the Maven zip file.

4. Unzip it to the folder you want to install Maven.
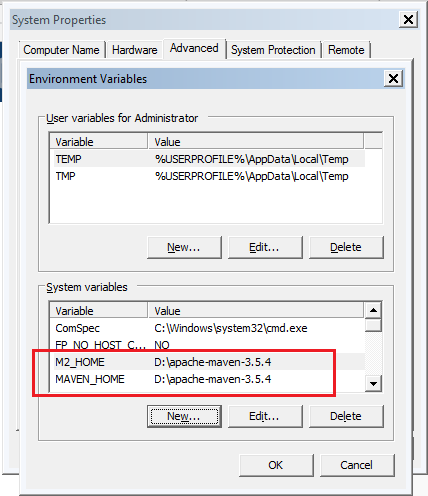
Assume you unzip to this folder – D:\apache-maven-3.5.4
5. Add both
M2_HOME and MAVEN_HOME variables in the Windows environment, and point it to your Maven folder.

6. Update
PATH variable, append Maven bin folder %M2_HOME%\bin, so that you can run the Maven’s command everywhere.
7. Verify it by run
mvn –version in the command prompt. Following message will displayed.
If you see a similar message, means the Apache Maven is installed successfully on Windows.
0 comments:
Post a Comment